★ Competition – win a Konus Wild riflescope worth £90 – enter here! ★


Maintenance man: stripping & rebuilding an Air Arms S200 Pt2
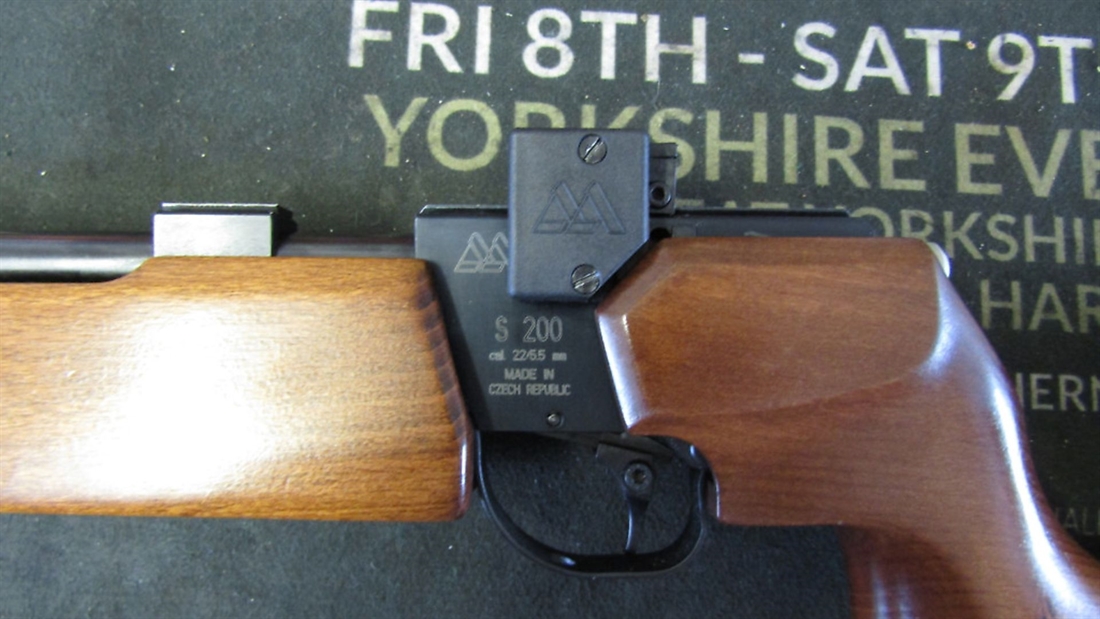
Our technical guru, Richard Nash, deomonstartes how to rebuild the classic Air Arms S200 rifle he stripped down last month

Following on from last month, we are going to rebuild the Air Arms S200. The S200 was an instant hit with women and children especially, because it is a lightweight and compact rifle with a short length of pull. It was also an ideal stalking rifle, given its weight and size, allowing it to be shouldered quickly with little effort. Over the following years, Air Arms have only produced the S200T or T200, target version, and there have been only two additional variations of the S200 put into production – the Mk2 and Mk3. Despite this, the Air Arms S200 remains a very popular and reliable rifle to this day.
Previously, we stripped down, cleaned all components and made everything ready to reassemble. As with all strip-downs, it is imperative that the rifle is chronographed once reassembled to check the power level, ensuring that it remains under the 12 ft.lbs. legal limit.

1 Lightly lubricate the bearing surfaces of the hammer, reinsert it into the action, and refit the cocking pin.

2 Now you can reinsert the hammer spring, guide, and tighten down the adjustment screw.

3 Moving to the pellet probe; remove and replace the probe seal. Lightly lubricate the thicker section of the pellet probe, reinsert into the action and refit the cocking pin.

4 Clean, lubricate and reinsert the cocking link bar.

5 Lightly lubricate the inside of the cocking link securing plate, and reattach using the screw, taking great care of this plastic component. Do not over tighten or it will break.

6 Reinsert the spring onto the stock securing pin, and replace onto the cocking link bar. Using the picture for reference, ensure that both ends of the spring are placed under tension correctly.

7 Lightly lubricate the ball bearing and spring. Place the ball bearing into the hole, followed by the spring, then refit the retaining cap that holds everything in place.

8 Reinsert the barrel into the breech opening, carefully tightening down the grub screws, so that they line up with the recesses in the barrel.

9 With the barrel secure, you can now refit the magazine system.

10 Insert the magazine unit correctly and refit with the plate and screws. Cock the rifle to make sure that the pellet probe doesn’t snag and that the indexing post moves freely.

11 Moving on to the air cylinder; firstly, check there is no air escaping from the knock-open valve. At this point, we can replace the cylinder face seal.

12 This shows the internal knock-open valve. If air is leaking through the top of the knock-open valve, this piece needs to be replaced.

13 Cylinder end-cap seals will also need to be replaced if there are any leaks present. To do this you will need the cylinder end-cap removal tool.

14 Now check the end-cap seal on the fill end of the cylinder. The simplest way to do this is to use gun oil dripped onto the join of the cylinder and end cap, if bubbles are present, there is a leak and the seal needs changing.

15 If your rifle has a fill probe, such as the one in the picture, the simplest way to determine whether or not the non-return valve is leaking is to place a balloon over the end. Remove all air from the balloon and wait to see if it inflates.
16 With all the seals now checked and changed where necessary, the rebuild can be completed. Refit the fore stock/rear stock before refitting the cylinder.
Related Articles
HFT news
News
Life at the range - Gary Chillingworth
Gary Chillingworth reports from UKAHFT Nationals Round 7 at Anston, where Anne Higgins secured victory in the Ladies class with a superb 55
By Hollis Butler
HFT news
News
Life at the range - Gary Chillingworth
Shooting is a sport built on fun, friendship and competition, says Gary Chillingworth. Sometimes, that little plastic trophy feels priceless
By Gary Chillingworth
Get the latest news delivered direct to your door
Subscribe to Airgun World
Unlock the world of airgun shooting with a subscription to Airgun World magazine, Britain’s biggest-selling airgun publication.
Written by passionate, long-term airgun enthusiasts, each issue delivers expert insights, comprehensive gear reviews, and invaluable tips to enhance your shooting skills. Whether you’re a seasoned shot or new to the sport, Airgun World offers essential content covering shooting techniques, classic airguns, and the latest equipment innovations.
Save on shop price when you subscribe and pay just £4.07 per issue – 42% cheaper than buying in-store at £6.99!