★ Competition – win a riflescope – enter here! ★
Full Functionality!
Russ Douglas reviews the fully functional ‘all-inclusive’ version of the Zulus ZHD520 he reviewed in the November issue. He is blown away by the functionality and Arken Optics’ receptiveness to feedback.
Wow! This is another level
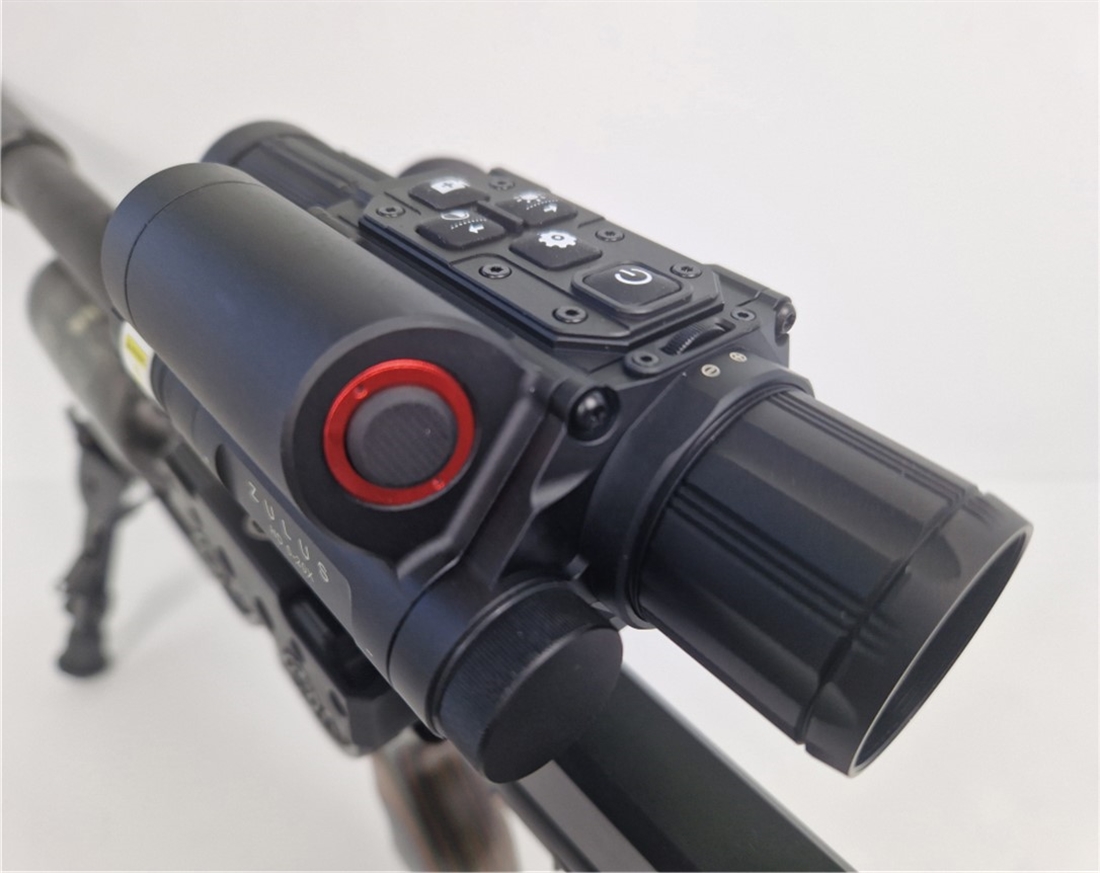
Following hot on the heels of my November review of the already very cool ZHD520 day and night scope, this is the newer higher-spec’ model. Ostensibly, all that’s changed (from the outside at least), is the addition of a relatively sleek/compact, tubular, laser rangefinder (LRF) module on the upper-left side. This has a rear rubberised button, surrounded by a metallic red circle, presumably to help discern it in low light. One cool feature from the front is the wee round infrared transmitter window being above the larger receiver window. For those in the know, this instantly gives away that the LRF’s downrange IR beam will be horizontal when viewed in low light/darkness. This is ideal for us roving airgunners because when scanning around for our prey, we’re often looking downward, toward a ground surface, where a level LRF splash (beam) will best range what we can see.
Setting-up
Opening the tidy box reveals the protectively bagged scope, Picatinny mounting rail and USB-A to USB-C cable within separate foam cut-aways. Also included is the user manual, a lens cleaning cloth, Allen key and four countersunk head Allen screws. I used all four screws to connect scope to mount via the channel in the latter, which helps ‘centre’ things laterally. Again, I found once mounted on my Airmaks Krait the reach-back wasn’t generous, but a solution is on its way – read on.
The zeroing procedure is the same as for the non-LRF model, where the only wee fiddle I found is short-pressing the record button whilst holding the rifle on-aim, to freeze the image without moving off target, but you can easily retry this as many times as needed until you’re happy because the record button freezes/unfreezes at will. Also like the non-LRF ZHD520, the zeroed reticle was a little high within the display. Arken have already responded to my (and others’) early feedback, so both of these issues are being resolved. Firstly, there will soon be mounts available with options of 0MOA or 35MOA forward inclination (declination), to give a choice for mounting on modern air rifles that already have 20MOA built into their rails; and for level rails respectively. Secondly, there will be a choice of long or short rails, the former for those of us who’d like to position our scope slightly further back. Lastly, there will also be a dovetail mount option because not everyone’s rifle has a Picatinny rail, and Pic’-to-dov’ adaptors can feel a hinderance in use.
User Preferences
Again, I disabled the visible gyro functions, for cant/inclination/compass because I feel these are a distraction. This scope has no less than 26 separate zero profiles, named A to Z, which together with the three reticle options – now in five colours, after they added black which I for one requested – give us lots of options to accommodate different rifle power levels and/or projectiles. One feature I love is being able to press a hot key to cycle through the five available reticle colours on the fly, to suit your target/background per shot; all without having to stop recording or enter the full menu – superb!
Oh No, Technology!
First off, don’t worry, this scope can still be used simply as a day or night scope, albeit with the awesome addition of a compact LRF. Simply press the LRF button to the left/rear, place the LRF aiming box over your target, or if visible, downrange the flickering LRF’s IR ‘splash’ itself, then read off the range, discreetly displayed top/centre. For those who use manual holdover, simply aim-off accordingly.
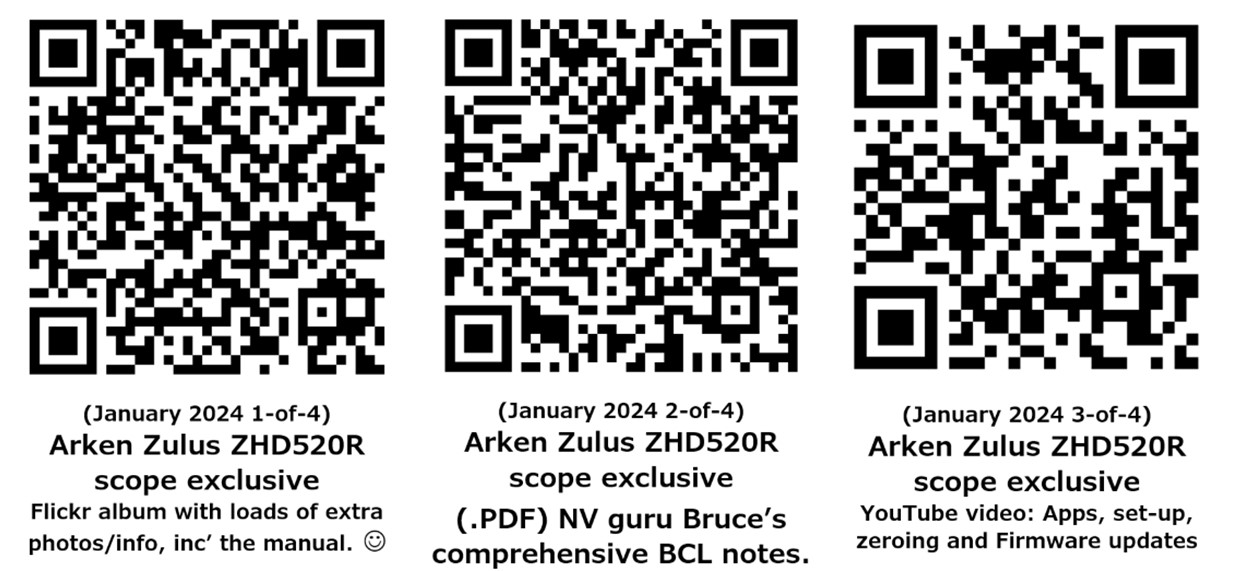
Scan QR code B for NV guru Bruce’s nine-page .PDF manual, which clarifies everything.
TAKE ADVANTAGE
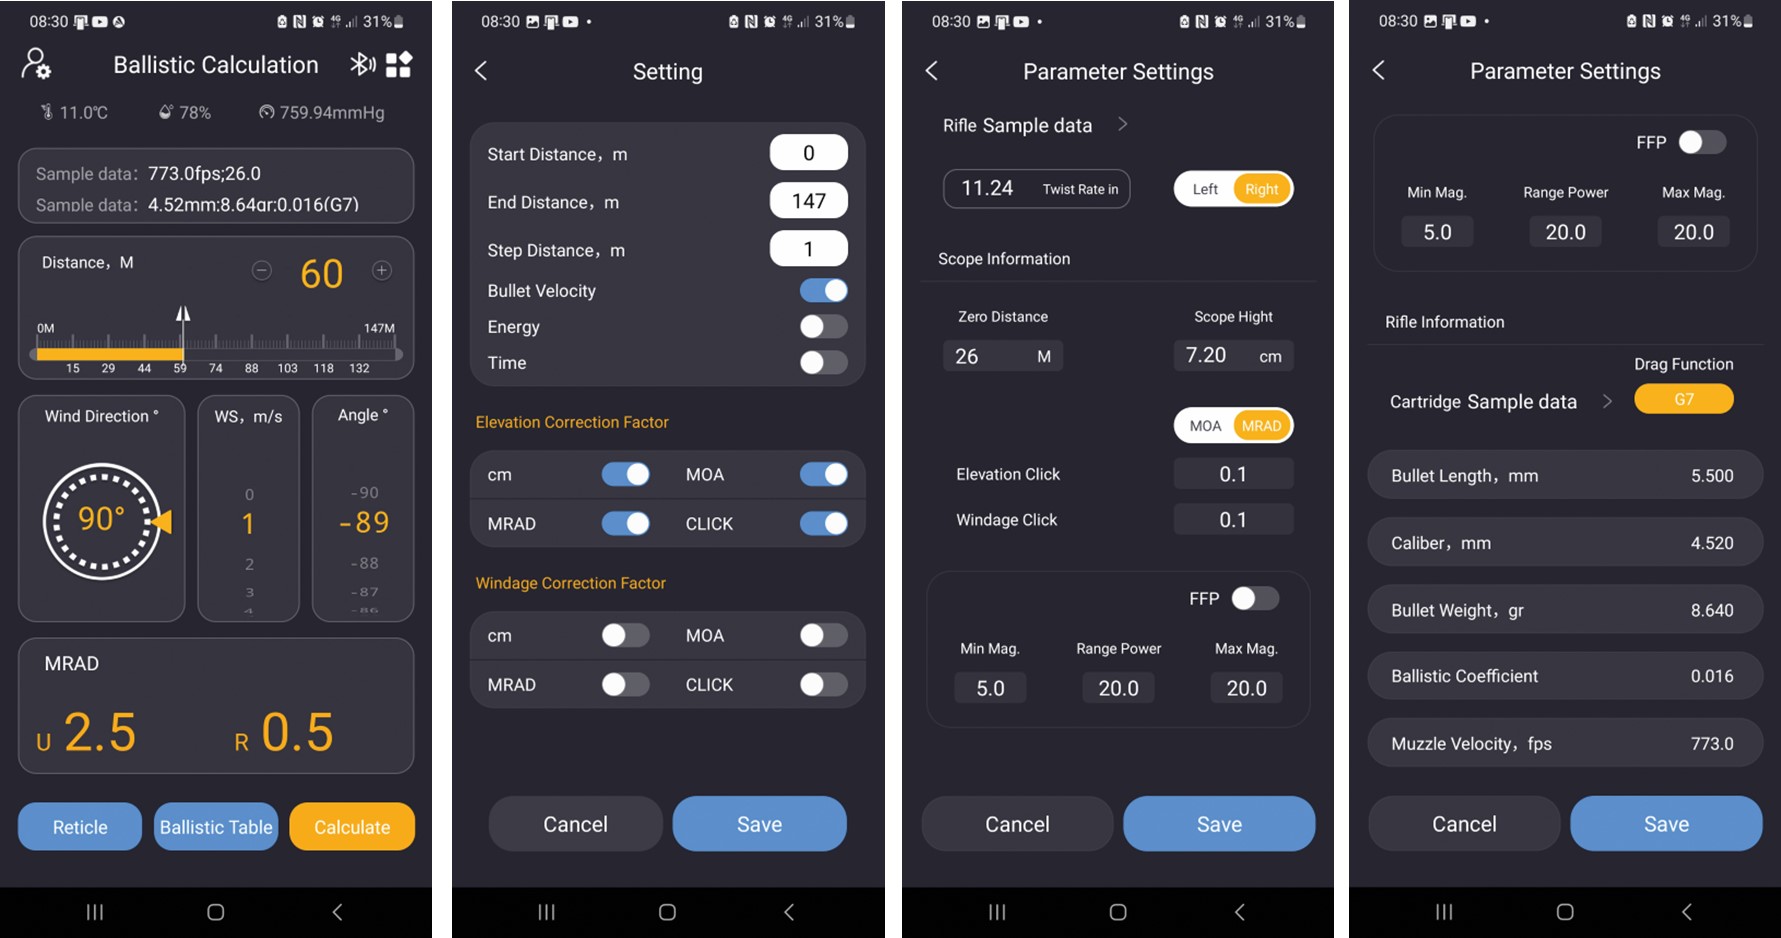
For those who want to take full advantage of the ballistic calculator (BCL) a veritable playground of options awaits. Every scope fitted with an LRF and ballistic calculator needs the same information for the tech’ to do its thing, so first determine that, in imperial or metric units, which you pre-select in a standalone menu. You then need the following:
-
Zero distance.
-
Scope height, literally the separation between scope axis and barrel bore; measure objective lens diameter and halve it, barrel/shroud diameter and halve that, then add the distance separating them. I like to also tape a gross overall sense check afterwards.
-
Drag function (options are G1 or G7, use G1).
-
Bullet length.
-
Calibre.
-
Pellet/slug weight, usually found on the tin, e.g., in grains.
-
Ballistic coefficient, found online if not on the packaging.
-
Muzzle velocity, measured with an accurate chronograph.
SMARTPHONE APP
Rather than input all this rifle/scope/power info into the scope itself, there’s an Arken Ballistic App for your smartphone. Don’t be alarmed by boxes for ‘Twist rate’, ‘Temperature’ or ‘Pressure’ because these make no real-world differences for us relatively short-range airgunners. If one day you graduate to long-range target shooting with 22-250 or 6mm Creedmoor, then you can revisit these instructions in more depth. You save all this data in a named profile (e.g. I called mine ‘Krait ZHD520R’, for my .177 sub-12 Krait).
With both Bluetooth and Location activated on your phone, click on Toolbox, then ‘Custom Ballistic Table’, select whichever pre-saved table you want to use, then press the paper aeroplane symbol top-right to send this info to the scope.
After a few seconds, you get an acknowledgement back ‘Transfer successful’, once it’s been successfully transferred across to your scope. There’s way more to this scope’s capabilities regarding different profiles, cartridge parameters etc., than I’ve briefly explained, so UK NV guru Bruce has kindly prepared a thorough nine-page user manual. This includes photos of the App’s various screens at different stages, to guide us through them – scan QR code #2 to access directly or download that PDF from my Google drive.
Fun Time
Don’t worry, it still needn’t be too complicated. For now, I have simply input the essential ballistic data into the App for my rifle/scope combo and saved it on a named profile, which I uploaded to the scope. I did this once and it’s worked perfectly since.
Now something else new and exciting – or am I just a gadget nerd? – is the option in the scope menu to aim per shot using the ‘holdover’ or ‘dial-in’ methods. With this menu option, if you go for dial-in, each time you use the LRF to range your target, the entire reticle moves up or down to match the calculated point of aim/impact at this new range; then resets to zeroed position when the LRF button is pressed again. I prefer using the holdover facility, so each time I range a target (white reticle selected) an overlaid red subtension (?) appeared, showing me exactly where to aim. With the reticles being first-focal (FFP), this moves position proportionately as you zoom in or out – perfect!
Is It Perfect?
Thanks to a firmware update, the picture-in-picture (PIP) window now includes the reticle, which also auto-centres the background imagery. Another is on its way – at my request – to ‘auto-centre’ the reticle on screen anytime you zoom above base mag’. This should help anyone bothered by their reticle being a little high with the 35MOA mount, for example, whilst they (we) await the 0MOA option becoming available. Sadly, the PIP box isn’t recorded, an omission common with several digital scope brands. Also the central/rear notched zoom wheel is a bit on the small size, so I’m glad I’ve only been wearing thin Macwets gloves so far during my testing.
Proof Of The Pudding
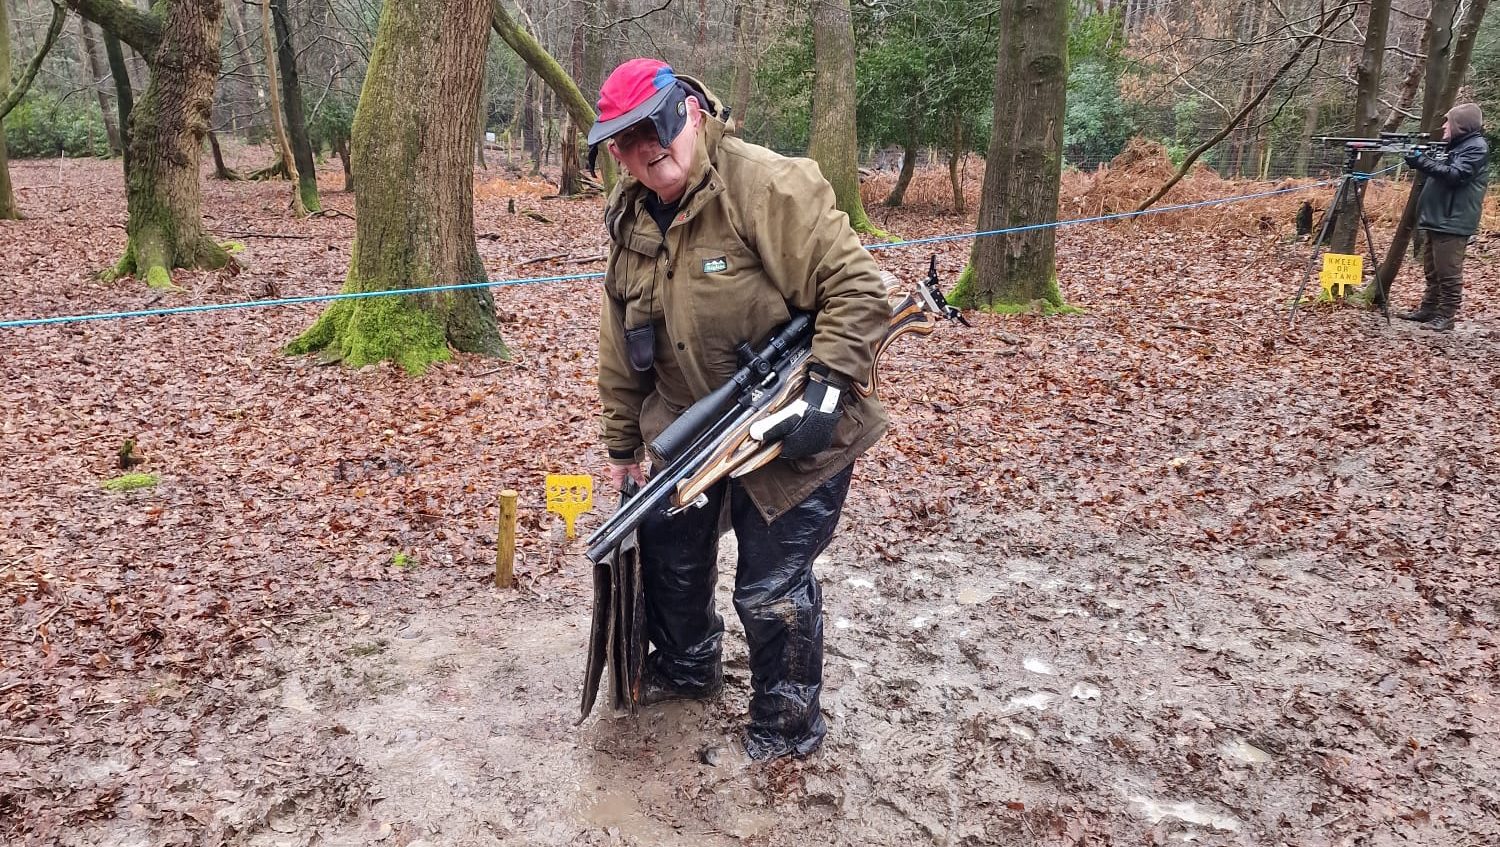
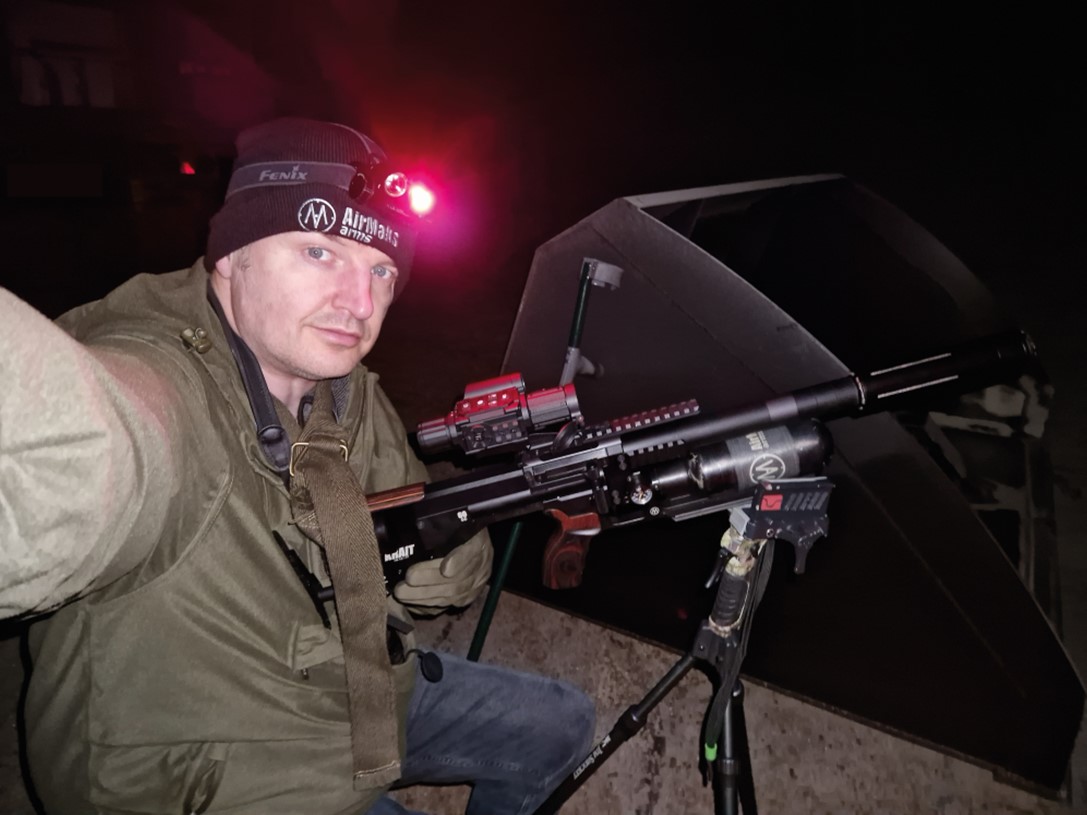
For my first few weeks’ testing, the weather’s been so rubbish that I haven’t been able to stretch its legs beyond 27m. In fact, last Wednesday, our club’s 50m outdoor range was flooded – nobody was heading out to set up steel targets in 3” of water! Hence, I’ve visited my local permission’s barns a few times with it mounted on my Krait. Inconveniently, the grain trailer has been parked front and centre every time, blocking my usual 40m line of sight and preferred 30m zero position. I was at least able to set-up just past the hardware, between fertiliser sacks and a tractor bucket, with a maximum 27m view of the busiest of the usual rat hotspots, as the wind rattled the barn doors.
The LRF doesn’t range below 10m (just like HIKMICRO devices), so I’ve impressed upon Arken Optics that reducing this minimum distance for the upcoming 3x-12x version would be preferred, if possible. I first zeroed from this position in daylight, then have returned after dark at every opportunity since. I haven’t seen any serious rat numbers, which tells me they haven’t returned in earnest after the hammering I gave them in August, but I’ve seen and shot between one and four rats each time. The scope’s onboard 850nm IR hasn’t spooked them; the LRF has ranged them every time, and down they go, reducing the pest problem one at a time.
Bruce found a weather window and did his own thorough scope test on one of his permissions, albeit having borrowed mutual friend Billy’s ZH520R scope on his .22 rimfire. He first zeroed at 50 yards, then using the LRF/BCL, was able to hit a 100-yard target first time, much to his satisfaction. You can watch Bruce’s own three short videos on his own channel: https://www.youtube.com/@brucemcpherson8832/videos, including one where he tested the onboard IR out to over 400 yards. He was also amazed to watch three deer at 457 yards in total darkness without any IR illumination, such is the sensitivity of the Zulus scope. He clarifies that its grainy low-light performance: e.g., when grass still shows as green after daylight’s faded, isn’t quite as impressive as the more sensitive, larger objective-lensed HIKMICRO Alpex A50T or Pulsar C50, but those scopes don’t have onboard IR, LRF or BCL – and they each weigh over half a kilo more than the ZHD520R!
Opinions
The AirgunForums.co.uk thread ‘HITTAC – Your Thoughts’ on these new scopes is already over 1,000 posts long and I’ve seen folk joking about selling theirs for three times the face value, such is the demand right now. Then they clarify that they don’t actually want to part with it. I hadn’t yet been able to get many other opinions besides Bruce’s and Billy’s, but Billy is a professional pest controller and is over the moon after buying his own ZHD520R.
Remember my review of the pre-loved folding Brocock Ranger XR? Well, fellow GARCer, George bought that rifle, saving me the job of returning it to Pickering Guns. Last Wednesday, he asked me what I thought of this Zulus scope, so I suggested he join me for a first-hand trial, in ‘real’ conditions. Two days ago, he joined me outside the usual barn because the haybarn’s still pretty jammed with bales – no doubt the rats are having a field day amongst those. After he’d kindly helped me in with the rifle, folding seat and trigger sticks, I talked George through the scope once he had it rested/shouldered. He tried the zoom, focused in both day and night modes, and tried the different levels of IR illumination. Then he ranged various objects and watched the overlaid red aimpoint move to suit the appropriate holdover. “It’s fantastic, I’m kinda reaching for my wallet already,” was his candid reply to me asking him for his opinions. Watch my review video for that clip.
Conclusions
As always scan the QR codes to see (1) many more photos in my Flickr album (including the whole of the Arken Optics user manual), (2) Bruce’s own full user manual including all intricacies of the ballistic calculator, (3) my video showing me setting-up the scope, then (4) a final video including nocturnal pest control footage.
I’ve now received my renewed Scottish Airgun License and FAC so will bring you that shortly. In the meantime, please take care and of course enjoy your shooting.
Kit Used
Arken Optics Zulus ZHD520R LRF scope £599.00
Worldwide: www.arkenoptics.uk/vibfok
UK: www.pro-optics.co.uk
Related Articles
Gear
News
Daystate Performance Center unveils fifth edition catalogue
Daystate's Performance Center has just launched the 5th edition of its accessory catalogue, "bigger and better than ever".
By Hollis Butler

Air rifles
News
Air rifles stolen from Polowood Shooting Ground
Polowood Shooting Ground has been hit by a raid, with thieves stealing around £30,000 worth of equipment, including air rifles
By Hollis Butler
Get the latest news delivered direct to your door
Subscribe to Airgun World
Unlock the world of airgun shooting with a subscription to Airgun World magazine, Britain’s biggest-selling airgun publication.
Written by passionate, long-term airgun enthusiasts, each issue delivers expert insights, comprehensive gear reviews, and invaluable tips to enhance your shooting skills. Whether you’re a seasoned shot or new to the sport, Airgun World offers essential content covering shooting techniques, classic airguns, and the latest equipment innovations.
Save on shop price when you subscribe and pay just £4.07 per issue – 42% cheaper than buying in-store at £6.99!