The countdown is on for The British Shooting Show – book tickets online today and save on gate price!
Take down, take apart
The Air Arms take-down rifle is a popular used purchase, but what are they like to maintain? Pete Evans gets on the case
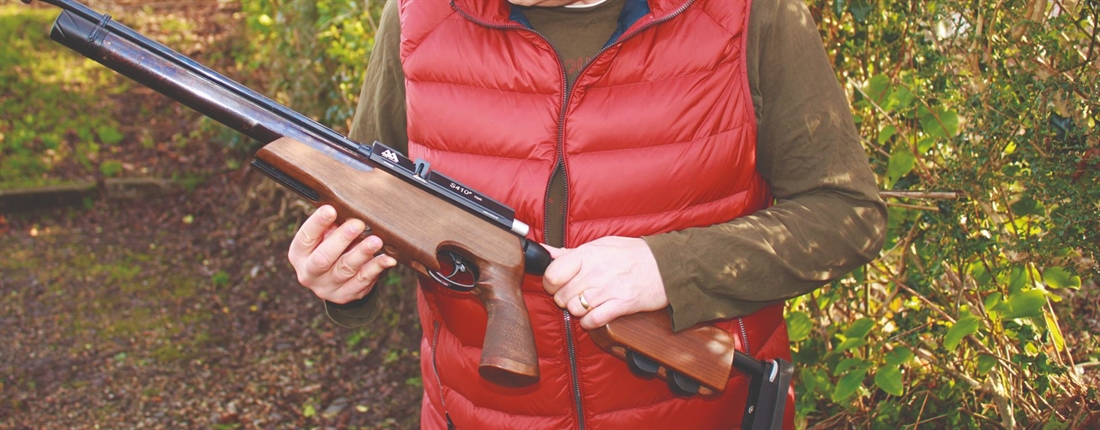
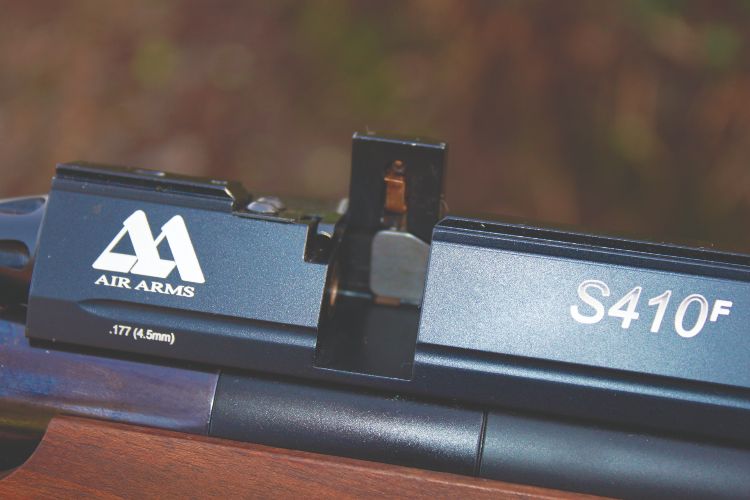
There is no denying the fact that there is a certain amount of mystique attached to a Take-Down Rifle (TDR). Perhaps it’s the vision of Edward Fox in the ‘Day of the Jackal’, screwing together his covert gun that intrigues you, or perhaps it’s the practicalities of using a space-saving gun. Whatever the appeal, they are a niche item, with currently very few to choose from in the current market. Most have come and gone, some reaching cult status – such as the Colchester Gamekeeper – others just withering away into obscurity, helped on their way by suspect build quality. Thankfully, for those keen to add a TDR to their collection, there is one model that has not only stood the test of time, but also is still available in an upgraded form. I speak of the Air Arms S410/510 TDR.
FIRM FOUNDATION
The reason for the this gun’s longevity and success is no doubt due to the fact that it is built on the foundation first formed by its ancestor the S300 series. It’s ironic that the S300 series was built to a price – £299 to be precise – so the action needed to be cleverly designed. Clever it certainly was, and well finished, which translated into reliability. Couple this with pleasing aesthetics, and accuracy, and you have a package which has been hard to beat. Thankfully, AirArms have resisted the temptation to change that basic design too much, although it has shown flexibility in its change to sidelever format, as well as the TDR under scrutiny this month. Originally, the S410 TDR was available in a bolt-action, short cylinder format, soon giving way to a longer cylinder, and ultimately being replaced by the 510 TDR in its longer hard case.
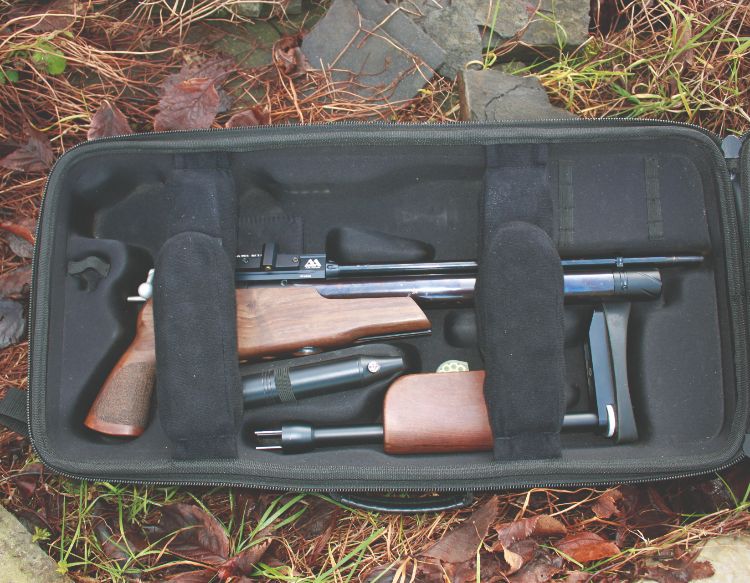
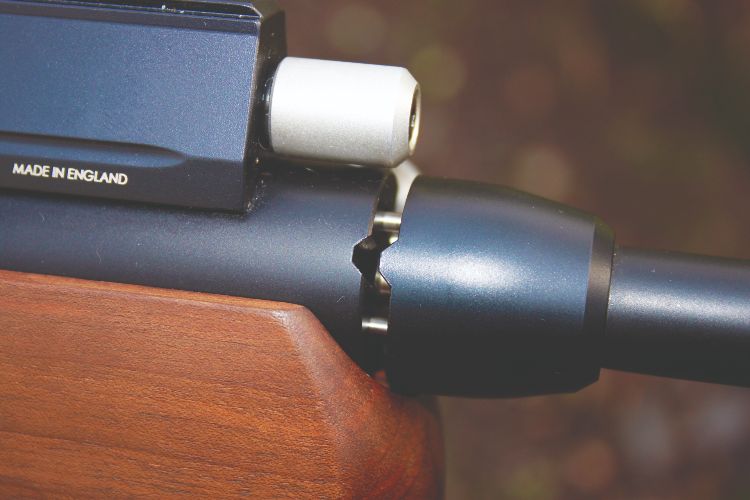
My main concern with any take-down gun is how sturdy it feels when assembled; any gun that screws together can feel a bit loose at the joints, but thanks to its design, the TDR is stable at all its connections. Potentially, the weak point could be the rear stock, but not only does this screw into position, but it also interlocks with the action with a series of castellated sections. This effectively eliminates any torsional forces, making it very solid. The moderator, held in place by a thumbscrew is equally stable, although it’s wise just to check periodically. Soft case, sculptured for all the accessories, including a scope. A non-indexing magazine needn’t be a big issue.
One caveat is to avoid using the gun without the rear stock fitted because in so doing, the power will be low, and you wouldn’t want to risk getting a pellet stuck in the barrel. The gun achieves its full power with the stock fitted, by means of the pins set into the rear stock, which effectively tension the hammer spring.
I don’t seek to provide a full review of the rifle here because I’ve undertaken this previously and don’t wish to bore you, although I do have a lot more virgin TDR material, so keep reading. At this point, I will introduce my latest TDR acquisition, with the slightly longer carbine cylinder, complete, but not without some problems, as we shall see later.
NO GUARANTEES
Any gun bought from a shop will be subject to the Sale of Goods Act, which suggests that a product should be of merchandisable quality. In gun terms, this would dictate that the gun should at least work, be safe, and in the case of a PCP, hold air. Exceptions to this could be guns sold as spares, or not working, and this should be stipulated on any paper work. If you have a good working relationship with your local shop, it might be possible from to time to buy guns in this category, although of course, it can be risky. In such situations, I generally add up the value of the gun in spares, based on what can be seen, and make the decision from there.
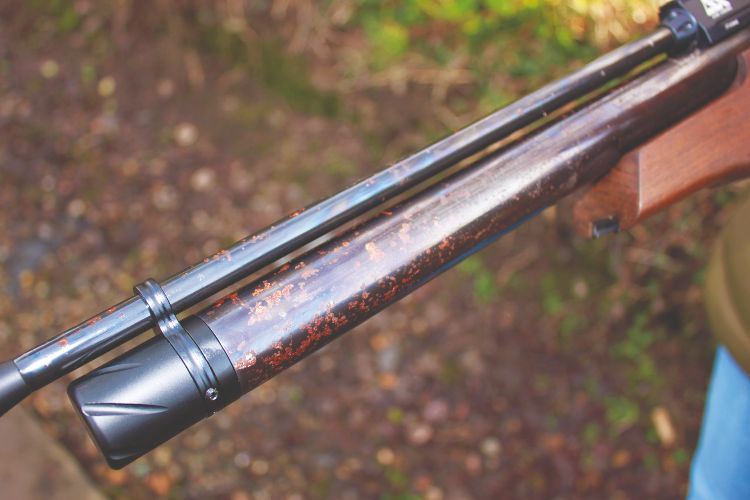
So, there it was on the counter, brought in that morning as a part exchange – a TDR, in .177, with two magazines, fill adaptor, moderator, Hawke 6-18 x 50 scope, and soft case. Those were the highlights; the lowlights were the rusty air cylinder, barrel, its inability to cycle the magazine, and an empty cylinder. On closer inspection, the remainder of action, and stock looked in good shape. I suspect that it had been used in the rain, and then stored without being dried out. No air probably meant that the gun leaked, and with a rusty cylinder it wasn’t a theory I felt inclined to test.
A non-indexing magazine is a fairly common problem on the earlier models, but not difficult to fix, and the scope itself looked clean, and far too big for my use, although if working it could be sold to offset the price of the gun. All the straps and zips were intact and functioning, so it was all down to price.
It seems that the shop owner had it in mind to change the cylinder and barrel, reseal it then put it up for sale. The shop was snowed under with repairs, I offered to buy it as found, and following some chin-rubbing and sharp intakes of breath, a price of £325 was floated, and I took a gamble.
ASSESSMENT
Back home, the first job was to remove and trial the scope, which all being well, could be sold. An hour later, I was satisfied, and removal of the mounts confirmed that the body hadn’t been crimped, which meant it could be sold with confidence. Sell it did, very quickly, on an Internet forum, netting me £50 which would go some way to the cost of parts for the refurbishment.
I removed the stock from the gun – just one hex bolt on the underside – to show that all the antii-tamper measures were still in place. This can only be good news because it proves the gun hasn’t been apart – only Air Arms has the ability to replace these.
Although I was unable to cycle the magazine, the action cocked, and dry-fired, which gave some assurance as to the trigger function and hammer assembly and there were no nasty scrapes on the woodwork, although it looked a bit tired. With my confidence brimming, it was time to get the tools out, which means a set of metric hex keys, and one other ‘special’ tool, which we’ll get too in due course.
SAFETY FIRST
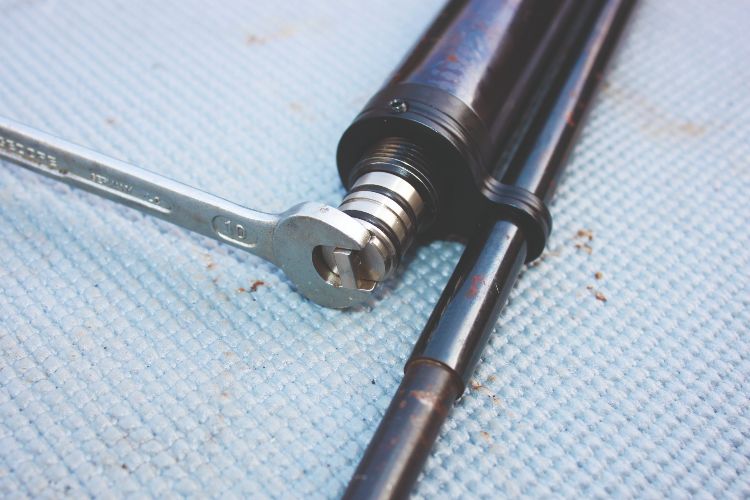
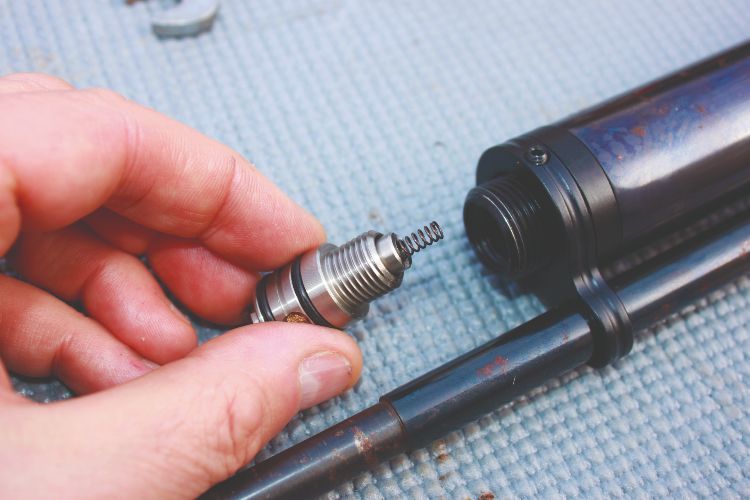
As with any pre-charged gun, before attempting any work, ensure that the gun is drained of air, and this can be accomplished in one of two ways. First option is the time-honoured method of dry-firing until the gun is empty, or if preferred with care, it can be exhausted through the filler valve. Select a 10mm open-end spanner, loosen the fill valve, and very slowly unscrew until you hear air escaping. Allow the pressure to reduce, until the gun is empty, and then carefully unscrew the fill valve. Be careful as it comes off because there is a small spring inside, and you don’t want to lose it. If you haven’t done so already, the fore stock/grip can be removed – one hex screw on the underside.
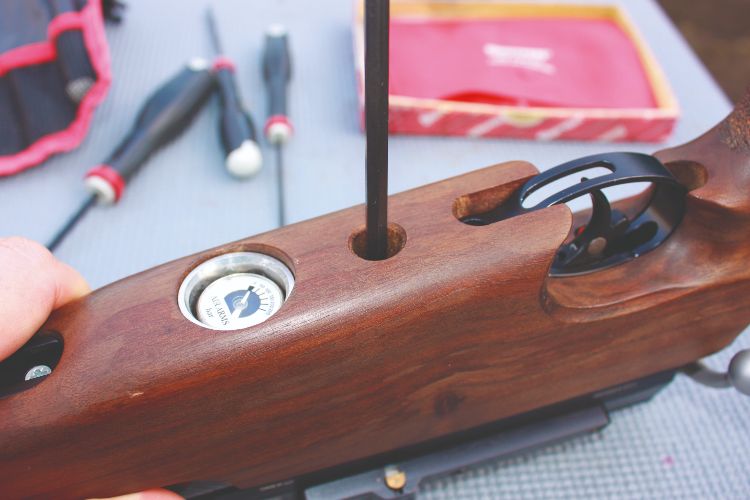
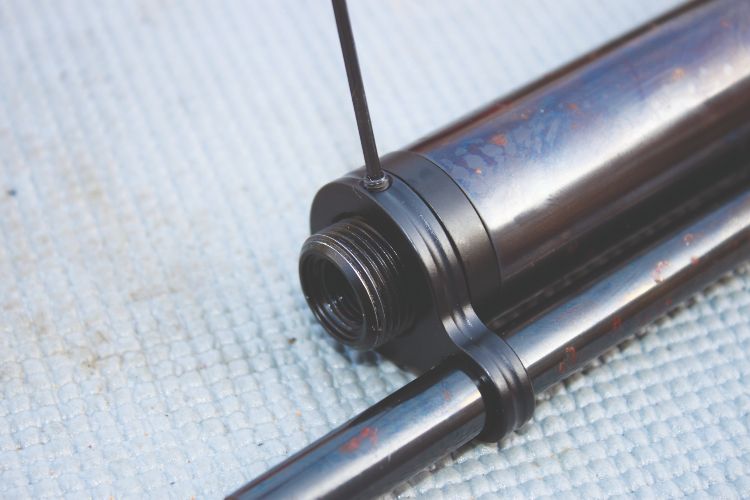
Returning to the fore end; after removing the two hex screws on the circumference, take off the barrel support band. Moving along the underside of the cylinder, locate the gauge, which is connected to the cylinder by a dog-leg assembly. If this is the first time the gun has been serviced, there is likely to be an anti-tamper cap covering the hex screw. It’s certainly not illegal to remove this, although it does give anyone examining the gun a clear indication that it has been apart. This makes it doubly important that the gun is checked after the work, and periodically, it ensures that its power is set below the legal limit. If you don’t feel confident in removing it, I would recommend that you take it to a gunsmith.
The hex screw on the gauge mount can be quite tight – if so, a well-fitting tool, and if needed some local heat will be your best friend.
ACTION SEPARATION
There will be six hex screws of varying sizes accessed from under the action, these hold the barrel and breech assembly to the action. One of these will be blocked by an anti-tamper plug, and one will be obscured by pin, which again acts as an anti-tamper device, and on this gun was particularly troublesome to remove. It’s very easy to damage things removing this pin, so again, rather than struggle take it to a shop.
With all the screws removed the barrel and breech can be lifted off. Note that there is an ‘O’ ring between the two, which acts as a transfer port seal. It will now be possible to pull off the rear section that contains the trigger block – there will be the striker rail protruding from the firing-valve body. At this point, the hammer and spring will be held inside the trigger block. You will now be down to the cylinder – the firing-valve body at one end, the filler housing at the fore end.
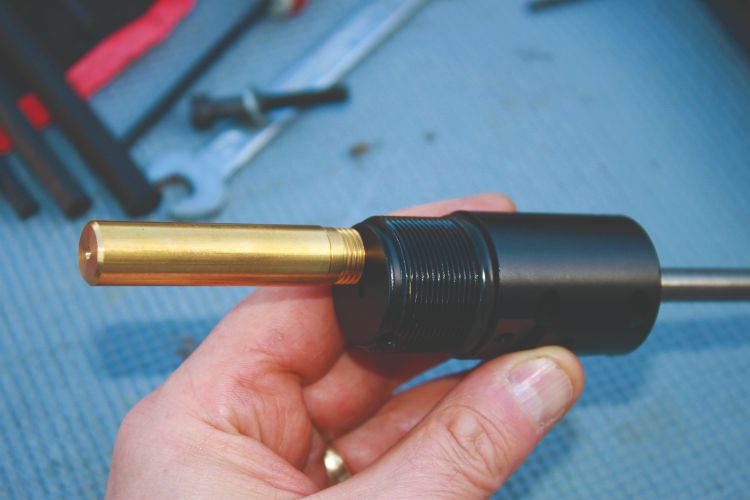
To remove the valve body you can refit the stock screw into the body, which helps get some leverage to allow you to screw it out. This is not usually tight and can be unscrewed with hand pressure. Remove the valve body with its brass pot, from the cylinder.
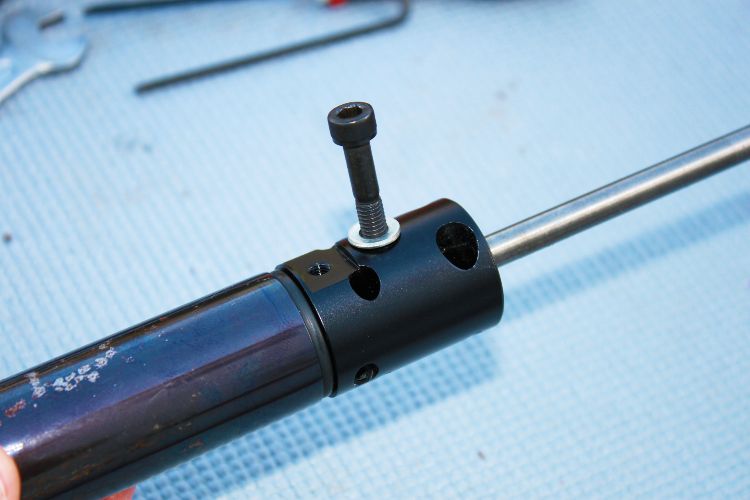
Just one part to go – the filler body – for which you need your ‘special’ tool. I ordered mine from Rob Lane, and it’s been a veteran of many strip-downs and never failed me. It comprises a large nut with two pins inset in its face, which correspond with the two holes in the face of the filler body. Again, this is not usually tight, but it’s easier to get the cylinder in a padded vice, and use a spanner on the tool. We now have the TDR in large pieces. Watch for my next piece which will be about rebuilding the rifle.
Related Articles
Get the latest news delivered direct to your door
Subscribe to Airgun World
Unlock the world of airgun shooting with a subscription to Airgun World magazine, Britain’s biggest-selling airgun publication.
Written by passionate, long-term airgun enthusiasts, each issue delivers expert insights, comprehensive gear reviews, and invaluable tips to enhance your shooting skills. Whether you’re a seasoned shot or new to the sport, Airgun World offers essential content covering shooting techniques, classic airguns, and the latest equipment innovations.
Stay informed with cutting-edge news, in-depth analysis and exclusive offers from specialist partners. Plus, enjoy the convenience of both print and digital access, ensuring you never miss an issue. Subscribe today and join a community of dedicated airgun shooters aiming for excellence.
